Showing posts with label Home Tour. Show all posts

Tuesday, December 31, 2013

a fresh color palette

The last few days have been pretty productive for me in the home to do lists, including finishing my half bath.  I honestly can't believe it's done especially since I've really been dreading re-painting the walls, but it was inevitable with all the holes that needed patching from changing out the towel bars and hooks and then a few weeks ago my cats decided to climb the curtains and yep it all came crashing down.  

Such happiness seeing  my IKEA print shining brighter against crisp white walls.   

The desire to change my walls from Behrs Peanut Butter to Martha Stewart's Vapor came about when I was inspired by the color scheme in this red, white and teal laundry makeover.  My favorite part of the design was the red knobs.  After scowering her post I found out where she had bought them, but after getting to the check out I stopped when the shipping for a pair of $3 knobs was going to be $10.  This meant I was going to DIY my own red knobs.  It was actually pretty practical since I already had the primer and red spray paint on hand and my cabinet already had the same shape knob only it was a pink flower ceramic knob.  It took several layers of primer even after lightly sanding it down for it to stick and then a few coats of red before I was happy with them. I do still need to add a layer of a clear sealer so they are more shiny than rough. 

I also had high hopes of using the sew now, sew wow fabric by Alexander Henry that Anna used for the ironing board cover, but outside of a toilet set cover I couldn't think of anything in the room that I could practically use it for and I didn't want to just frame it.  So you can image my happiness when I came across this $10 dove poster art on one of my trips to IKEA


I've yet to hang up a towel rail or hook, because after sealing seeing the bathroom so clean and crisp I didn't like how my IKEA ENNUDEN towel rack looked.  Plus, I really love the ceramic hook that Anna had in her laundry room, so until I can find one similar I'll continue to drape the towel over the cabinet door.

I used command strips to hang the mirror and IKEA RIBBA frame so I didn't add more holes.  I really should buy stock in them, because most of my frames and art are hung up by command stripes.  They really do save me from having so many holes in the wall from the countless times I've changed my mind.  I just used the Velcro stripes for the IKEA frame.  I always cut the Velcro in half vertically and use 1 strip for each side.  this way I get more use out of each strip, especially with the back edging being so thin.  However, for the mirror I opted to use another version, one that the wire could hang from.  
  
I also think that I will opt to using bar soap rather than a dispenser.  I really hate dispensers, especially if I decide to change out the soap.  Plus, I think it will keep it simple.


I'm quite happy with using my vintage telephone / record stand since it's not been very useful in the living room.  It's far to light and my cats like to catapult from it, which usually results in it falling down and anything on it.  This way they can't knock it down and it holds all my extra towels instead of them being on the back of the toilet tank.  I've also added the air fresher on top since taking the photo. 


The MYRVIKEN hand towels and PERSBY area rug are both from IKEA..  I tried looking on their site, but it looks as if they are no longer available.  I did just purchase sometime after summer and the hand towels were a new design then so they may still be available in stores. 


I didn't take out the anchors for my IKEA ENUDDEN toilet roll holder as I new I wanted it back and love that it holds to rolls so we don't have to change it out as often.  I also like that it has a "top shelf" which allows you to utilize the space.  At one point I had the air fresher there, but I really like my ceramic dogs so for now I have them resting there.

I do love how the whole look came out and it's far more refreshing and open and better liking to my Scandinavian design tastes compared to how it looked prior with the Behr Paint as you can see before with my last photographed update in May.

May 4th update

Below you can see my priming progress.  It was definitely a challenge painting this small and cramped space, but after two coats of primer and a coat of Vapor I'm sooo glad I did it.


I decided to just paint the bath walls white, but the only white I had was a matte finish, so I thought this could be a good way to veer from the Picket Fence by Martha Stewart that I painted the dining room, because it was stark white so I decided to go with my original white Vapor which has a slight gray tint to it.


I'm also glad that I  figured out how to paint behind the light fixture without having to disconnect the wires. It wasn't fun, but I'm glad for it.   


It feels good to finally have the walls painted.  I only needed one coat of Vapor, which I was very thankful for and after adding all the hardware and accessories I'm very happy with how it looks.

Tuesday, November 12, 2013

creativly speaking

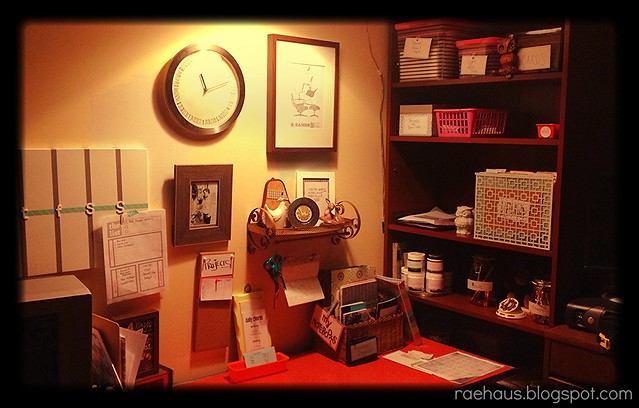
Lately I've been calling my 3rd bedroom my creative space, which seems to fit all that I want the space to be; housing my workout gear, craft supplies, my workout gear, and home management system, and of course write my blog posts.  I'm pretty excited about my current plan, which I'll talk about later in another post, but I'm pretty sure it will make you laugh at how OCD I am when it comes to planning.  
It's been nice seeing the progression of the room even just over a few weeks.  Each day I have been working on a new task that moves at least one item out of the clutter zone and it's made the biggest difference.  It's also nice having some of my favorite things in use, like my vintage shelf that now houses my ceramic rooster, diy sun shine art, vintage deer stapler, and simply DIY art.  In the near future I plan to paint the vintage shelf love-in-the-mist (light blue) by Martha Stewart. 


Some other projects that will have to wait for another phase is painting my IKEA RIBBA frame Love-in-the-Mist.that I have show casing  an Eames print.  Can you tell I'm obsessed with this color blue?  Along with wrapping this pretty floral print from Joann's around a cork board.  I would prefer to hold off for now until I actually have my desk systems in place so I have a better grasp as to what size cork board I'll have room for. 


I would like to paint 2 of the walls the Love-In-the-Mist as well, and add in Moonglow (light green) and the pink from Cave Girl Office Reveal as my accent colors. 

At this point I don't have a deadline for the space to be complete as I know it's going to take some patience on my part to allow for time to find the exact pieces, in the right color and a convenient location.  It would definitly take less time if I bought the items new, but I just can't afford to do that right now so I'll be keeping an eye out on craigslist. 

For now I just have to use what I have on hand and try to make things work, but it's not been easy.  My desk is held up by two end tables so it's not quite table height so I end up hunching over in my chair to work. 

Thursday, August 1, 2013

The Start of Style Cure 2013

Whosh!  that's pretty much how this last month can be described.  It seems as if this last month was like a blur, and I'm looking forward to taking August slowly and really start to tackle clearing out our cluttered basement.

Oh, but the main reason for this post is to talk about a new series by Apartment Therapy called The Style Cure 2013.  I just love their home organizing series.  In January I participated in the January Cure 2013 and I really enjoyed  getting some help with focusing my thoughts & completing some much needed projects.

Day 1 is all about completing the Style Cure Interview, which takes about 30 minutes to review and then analyze your answers. Below is a photo of my interview. 


The Chosen Space:
The Living Room
This is the space everyone sees when they first walk into my home, and it's a bit everywhere considering I have 2 wall colors, pictures leaning against the sofa waiting to be mounted and some miscellaneous furniture pieces that have been posted for sale.

The Conclusion:
Questions: 1 & 2 Form a picture of your style
My style is definitely relaxed classic style that is simple with a touch of vintage. 

Questions: 3 & 5 What you find pleasing, comfortable & beautiful
I find something that says "me" in the space and that I find brings people together.  I loved having dinner parties in my 1-bedroom apartment in South Denver where I had a table that seated 8-10 people where we could celebrate each other and share a space together that was simple and put together.  This was also my most well designed apartment, because I only had what I needed with a simple decor items on the wall and nothing more.

Questions: 4 & 6 Aspirations, form direction and goals
I don't really have one person that i admire, but I tend to look up to people who are strong-independent, who think outside of themselves , and are well-traveled, because it really helps to grow them and they're not afraid to explore and find out that there may be some place better then what they are used to.  My main admiration are those who simply enjoy what they have and are content owning very little and don't overspend.  It's a place that I've been working towards these last few years.  It's been harder since my mom moved in with me, because she owns enough for 3 families. 

I know I want my home to be full of light, but it's difficulty living downtown so we keep the curtains closed most of the time, and there are few windows being that I'm the middle town home.  Natural light is a commodity that I hope to figure out how to utilize what I have to create this feel.  I also want to eliminate the access clutter of items that are not being used or really don't work well for it's given purpose.    Mainly, I hope to determine a wall color so I can eliminate the bland pb color I've had on the walls since moving in. 


My living room is a bit different currently, but this is the overall feel and pieces that I have in the space. 

Wednesday, July 3, 2013

{Weekend Organizer}: A White Picket Fence

instagram sneak peak 06/16/13

It's been very hard being in the middle townhouse and keeping our dog from wondering into our neighbors yard for which some reason he likes to poo.  Typically right behind our stair rail, not really in their walking path, so it's not really been a huge deal since we do keep it cleaned up as much as we can.  We have shortened his lead several times, but it leaves him leaves him a very restricted space even in our own yard to wonder around.  Our neighbors on the left have a double-sided privacy fence so that's been a benefit for us as well since we don't have to worry about that 8' stretch.    

Raehaus - length of dog lead

I had initially been hoping to find a home with a fence, but with this house we had so many of my wish list items that not having a fence didn't seem like a deal breaker so we figured we would install one shortly after moving in.  However, after doing a bit of research on the cost of vinyl and wrought iron fences that idea became more of a distant future happening when the materials list had been calculated at over $200 even for my tiny 10'x8' yard.  Plus, I had hoped to find a wrought iron design that had a 20s feel to it, but that has proven to be more difficult then anticipated. 

We had actually forgotten about the fence for a while, until recently we had a one of our lighter vintage push mowers was stolen off the back deck and my mom took charge and began the search without telling me.  Though, being the item it was we have an inclination of who it was, especially since none of the more valuable items were taken.  It's just really irks me that some people feel that they have the right to take something off of someone's property that they neither own or paid for and feel that that's acceptable behavior. 

Within a day or two of our incident my mom had found a someone nearby who was selling a white vinyl fence they had been using as a dog run, and for only $40.  Although, I was a bit hesitant until I saw the fence (really after my mom called the guy and he delivered it) that it was going to be a size appropriate fence for my miniature backyard. 


The fencing was left on our deck for a few days until a friend of my moms could come over and install it for us, which ended up giving us a few surprises and costing us more to have the fence installed then the actual cost of the fence.


On day 1, we talked about the layout of the fence and then began the initial install of the largest 8' run, but that took several hours since there ended up being concrete and all kinds of debris under the ground to help support the walkway to the parking lot steps. This then directed us to purchasing another pole hole digger since the initial one was a very cheap model, and also a large piece of rebar to help break down some of the concrete.


My mom's friend kept working trying to break down the concrete, but I really wished he would have stopped, because we were one paying him by the hour and two he was working harder then he needed to and it would have made more sense to wait for the proper equipment so the job could have been done efficiently.

Saturday evening we made sure to head to home depot to pick up the appropirate supplies, like an Ames 48" post hole digger (an upgrade from the basic warped model my mom purchased from Lowes), and a Ludell 70 in. 17 lb. Tamper Head Digging Bar that was used to break up the concrete mess under the pavers.

On day 2, now that we had a better post hole digger, and the digging bar the process took half the time.  It took some time to settle in, but once things got started I had been called out to discuss the gate.  What I didn't understand was why we were discussing this again, since we had already talked about this yesterday and agreed that the gate would not open into the neighbors yard, but stay on the stone pavers.  I really don't want to be walking on the neighbors property, especially with it being a rental and we will have new neighbors soon who may not like us walking in their yard.  Once that was settled, again, the digging bar and post hole was used to make the way for the gate posts to be installed and then had to be leveled again so that they gate would be level.

It took a few hours, but what pieces we had for the fence was finally installed and only being 30" shy of finishing the entire project I think we did a great job at scoring a vinyl fence for only $40, which is the price of either an 8' section or the gate kit.  By the time everything was done we paid with installation and the fence what we would have for the entire fence so overall I'm pretty happy with how it turned out.


I am filled with jubilation that yes, I finally have a fence!  


Once everything was installed we realized that we were just shy of finishing the area by only 30" so for now we put up a doggy gate and used a brick to keep it from falling over.  So far it is doing the trick, but at some point I plan to use some garden post and shims to make a trellis and then rotate the rose bush so that way it can grow up the trellis and look as if we planned to leave that amount of space. 
Total Cost:
$32 Post Hole Digger (a friend is buying this off of me for $25)
$32 Digger
$40 Fence + gate kit (estimated cost of new $120-280)
$160 Installation
$239 Total 


Wednesday, June 12, 2013

Simple Living part 3

HomeCare
Here is the last part of the Series Keeping the Balance and with it I hope to achieve a maintainable plan in creating a neat and happy house.  The one thing that I struggle with is my perfectionist personality, yes I willing admit to my slight type "A" personality that likes to have things in their place and really as a single adult with no children I don't feel like that should be difficult.  However, since purchasing a home that is almost 3x the size of any apartment I've resided in and has 2.5 bathrooms it feels a bit overwhelming to keep up with.   It's also not just myself that I'm cleaning up after, since my mom moved in with me last June and she doesn't share the same tidy-home philosophy.

For me it's been easy, because of the number of moves I've made in my 7 years living in Colorado.  I started out with a huge load and with each move I downsized, and even between moves I would sort through my items and make regular trips to the goodwill.  However, my mom has been primarily stationary for the last decade and even with the 3 moves she did make anything that didn't fit (floor to ceiling stacked) in her apartment was taken to a storage unit, and left there to be sorted through later.  Although nothing has really been done there except to add more items.   The sad part is that most of the items were not purchased with the idea of using them, but with the intent of reselling.  Let's just say that she never following though with that and she never learned to stopped purchasing items so her material items kept creating more chaos and taking up more space.  

I will say this that in the last year my mom  has  made some strides in improving on this habit.  We have sold many items and things FINALLY clearing out.    I do feel like we should be further though this battle, but there is always an excuse not to work on this process.  My mom does have many strengths that come in handy, like calling the city to take care of garbage left by previous tenants, trimming tree branches that have caused damage to other home dwellers in our neighborhood and on top she also works full time as a in-home care giver. 

Goals
A lot of her items are small and many, so what I hope to achieve is creating a numbering system to log them and then find a home for the items in the basement once they have been posted for sale.  Being that our basement is unfinished all items will need to be safely stored in sealed containers to keep them clean, and easy to reference.  I also hope to that the items will sell and well gain some much needed income to use for bills and replacement items.  I also want to schedule a day each week for us to work on these items, and have an area in the house where we can take professional-novice photos. 

Moving toward a tidy MCM Home
Life can be funny sometimes and remind you just how simple things really can be when it's the right time, and now seems to be that time for us.  We've been working on smaller projects that have allowed us to move forward in our tidy mcm home and it's filled us with such joy.

I also love that by traveling to DC and Baltimore has helped to remind me of how much I love to travel and that I don't want to spend my days cleaning my home, but that I want to spend my time with people I love and blessing them.  It's also ironic how I bless people is cleaning and organizing, which really is a passion of mine, and I'm glad to inspire others in that same direction.  


A few of the things we've done lately that has spun the wheel towards our mcm home was selling our sectional.   It's really been a process, as I started out with just wanting to sell the left side - one arm chase, but it wasn't meant to be until I was ready to part with the entire set.  So after taking new photos and updating the listing the sectional sold on May 17th. 
 

It was a joyous feeling that filled my heart when the living room was empty for the first time since moving in and now I was free to begin the journey of creating a tidy mcm living room.  I had to keep reminding myself to be patient during this search so I wouldn't buy something, because I think it would work and I may love it, but I really had to love it....like eyes light up I LOVE this piece for us to buy it.   

Surprisingly it didn't take long and to find exactly what I wanted in my space and for far less then what we sold the sectional for.  It was pretty fantastic actually, and we even made a few new friends along the way and found some new stores to check out. 

 Instagram Sneak Peak: Sofa

 As written in the journey of creating a tidy mcm living room I talked about how we scored our mcm sleeper sofa, and after a few weeks I'm still loving this piece and sit on it often.  I'm also really looking forward to doing a DIY on my $4 mcm table tripod lamp.

 Instagram Sneak Peak:: Living Room MCM finds 

I think my favorite part of this journey is that it really didn't take long.  It was almost magical - like it was meant to be for us to find these items now.  It was such a fun time to spend with my mom and even more magical when we agreed on a few of the pieces, well maybe not the tripod table lamp, but the couch - YES!  You know it's meant to be when two people who agree to disagree on furniture styles find a happy medium and my home is really starting to reflect my love of the 1950s simple living.

 I'm also really glad that we waited and for only $80 we found a great loveseat for our space that was also a sleeper so we didn't have to compromise about having a place for guests to sleep.  This was such a blessing and saved us over $500 on buying a new sofa that I really didn't love, but could have worked.  Also, I love that the bottom legs are simple screw in pegs so I can swap them out for tapered legs. Oh, and I almost forgot to mention that the sofa is pretty light, even for a sleeper sofa.  A guy friend and myself moved it from the van to the house and it's pretty easy to maneuver in the house as well.  I love easy to move furniture!

I'm also very excited to have a sofa/loveseat height that works with my mcm tapered round end tables.  They are so adorable and at only $2.50 for a set of 2 was a steal. I'm also loving the scalloped edge black magazine rack that I found at the Salvo I purchased the sofa at.  I found it when we went back to pick up the sofa 2 days later. 


I'm hoping to have my gallery wall up and displayed in the next week or two, but I've been pretty hesitant on hanging anything.  I'm a command strip kind of gal, because I always end up hanging things up wrong.  This time I'm gathering some extra cardboard to cut out the frame shapes and note where the holes go and hope to purchase some picture ledges from IKEA so I can create a similar look to #3 on my design board.


As you can see my dining room is also being weeded out and the large objects are finding new homes.   My mom's had a commercial elliptical for a few years and it's been moved between my living and dining room since moving in and really neither of us use it enough to justify keeping it.  I had it posted on Craigslist a few months ago and people kept trying to talk us down so I had taken the ad down.

In May I decided to create a new listing with fresh photos and within 2 weeks the elliptical was been sold to a young medical couple who is very excited, which makes my heart happy knowing that it's going to a good home.   They were also very impressed with the quality and smoothness of the Precor, especially for our asking price. He is receiving a quality machine for about half the price new & I'm glad to bless such a lovely couple, especially one who is very grateful to have it. 


It's funny how it all happened, like an aha moment when you know it was meant to be. Now this lovely cruiser bike that I purchased on June 1st resides in it place.


What are some successes you've had with downsizing and decluttering?  Have you had any aha moments or just hit the right timing?

part 1: Fit Life
part 2: The Social Dancer

Wednesday, June 5, 2013

{Weekend Organizer} Evolution of My MCM Kitchen

I'm super excited to be showing you how my kitchen has evolved this last year and a half, and how much I'm really starting to love being there.  It's funny how simple things were with the previous owner; she had a very minimal furniture layout so the spaciousness created a very inviting atmosphere that we lost for a while, but are slowly bringing back.

 Here is what the Kitchen looked like with the previous owner. 

This is what it looks like now!!!

I'm really excited about this sunflower fabric bag and I plan to use it as wall art above the credenza.  I just need to cut down some plywood or foam core to fit an extra IKEA frame that I  accidentally broke the glass to, but it's the prefect size for this piece.  I'm thinking of painting the frame either orange or yellow to contrast with the wall.  I also plan to wrap a layer of batting between the plywood and fabric to add some dimension before installing it above the credenza.  I'm also on the look out for a unique shelving unit to hold my collection of s/p shakers and owls.

I'm excited to finally have a home where my vintage ceramic canisters can be displayed.  Now I just need to figure out what to put in them since they don't seal.  I have been using the flour canister for my coffee pods, which seam to be working well.

I love my got milk? jug that supposed to I think be used for creamer, but it doesn't seal and since I don't drink much coffee at home it's not the best use for it.  I love that it fits my dish sponge and scrub brush and so far it's working very well.  I also added the sink stoppers to the hooks where my sponge and brush were residing. My mom even likes the new set up, which is saying a lot since we agree to disagree most of the time.

Raggedy Ann is safely being displayed in the corner to the left of the sink since there is nothing there & it looks kind of bare.   I decided to swap out the solid curtain for these sheer panels from IKEA, which I actually kind of loving.  Plus it works well with the $1 macrame, that's housing my fake plant and IKEA planter.  I also really like looking at my owl s/p shakers (currently only for display) every time I get bread.  They really pop next to the avocado green napkin holder.  I'm also really glad that my bread box once again contains bread!!  I was using it for spices and was using a smaller wood bread box for a while, but this is a bar better fit.

the beginning of a happy space 
Things really started to come together in March when I started to focus on being happy in my home.  This is a nice home and I want to treat it well, but I don't plan on spending more than 4 years here.  I simply wanted something simple that I can build equity in so wanting to make mega changes and spending money on a house I don't plan to stay longer in is really silly and unpractical.
Organizing is a passion of mine, and one of the reason's I went to school for design.  I learned a lot from my days in the field and know that there are small changes that can be made to create a welcoming and tidy home and I'm loving how close my home is becoming a happy space.  

By having a design plan it helps us to know where were going in the space so we save ourselves stress, time and money by not buying items we "think" will work and later regret.  Plus, we have it pretty easy these days in creating a plan and design board with the help of Pinterest (free) and Photoshop Elements ($100 aka the poor mans Photoshop) plan so we know when we've found the right piece(s).

---------------------insert kitchen wall elevation--------------------------------

With my design plan and elevation in hand of the window wall I knew when I saw this 3 piece dresser set at the Salvo in Camp Hill that it would be perfect. 

I mean check out the number of drawers on that bad boy.  It had storage galore and my mind started racing with ideas.  I still didn't pounce on it Saturday night, because we found out that they were having a 50% sale Monday for all their furniture and they're closed Sunday's so we decided to wait and measure just in case.  Yes, I forgot to add the dimensions of the wall and window to my design plan, so measuring once we got home was the first thing I did.    They were right on with how I wanted it to fit, and the we decided that the 2 end tables would go in the 3rd floor catch all room for now.  I think they will make nice storage for our printer + supplies and other office storage.  

I'm VERY glad we waited, especially since Monday morning we scored this 3-pc dresser set for only $40!!!  Oh, did I mention that it's by Lane Furniture, double score!  


This thrifted mid-century mod dresser post by Dream Green DIY came to mind when I saw this set to, so I plan to do a similar DIY and also add some fabric to the removable door panels in the middle before the end of summer.  It's going to be quite a task to take on, but so worth it to see this baby transform into a mcm beauty.  

The evolution has definitely been a challenge, but I'm thankful how well it's moving toward a happy space and finding the balance in my home.  


learning to be content 
I've even grown to love my wonky wall, which I've been wanting to do something with for a year now.  It was such a wasted space, but now I love the simplify of the space and that I can hang my broom and dust pan so they are easily accessible, and paired with my garbage can.  I've also found a home for some retro wall art there and my orange clock.

the kitchen evolution
 Here's a reminder of how it looks now

Things have come and gone in the kitchen, but I believe that this new layout is going to stay for a long while, as it seems to be working quite well for me.  There are no annoyances and things are tidy in their place creating an open room, which allows my counter tops to be free and clear of clutter.


At first I started by installed IKEA curtains across the entire wall, then put a bookshelf between the windows and decided to paint the walls Behr Enchanted blue, which I later regretted.  It really reminded me of California surfer blue.


After that design flopped I decided in December 2012 to swap out the bookshelf for a cubby shelf,  add art on the wall above and then added a small makeshift table in the middle.  The cubby was far more practical then the bookshelf, but it still didn't hold what I needed, and with everything being exposed (sadly this was the idea) I realized that what I really needed didn't aesthetically fit in the space.  


I also found these adorable vintage ceramic canister at the Salvo and added them to the main counter space.


This April I decided to change out the wall color and painted them Endive by Martha Stewart.  I took out the items between the window and added my vintage Formica table top to create a simple eating area, along with adding a pair of curtains to one of the windows. 


A few weeks later I added an IKEA Billy Bookcase that had been housed in the living room, before going to the dining room and now founds it's way to the kitchen so I could store more things vertically, but again it was a bit annoying having to work around the table.

I also displayed my made in the USA vintage coffee cups.