Showing posts with label 60 minute. Show all posts

Friday, December 13, 2013

tucked in a bin, a little organization

Most of my nights lately have been parked in front of the TV watching holiday movies, however tonight I'm proud to say that I headed straight up to my creative space and organized my built in dresser drawers.  I sadly don't have any before photos, but I can tell you that everything was just thrown in the drawers and nothing really had any particular order.   It was really getting at my type A personality and I'm so glad to see some order to them. 

My hygiene drawer was the first drawer I tackled and it looks a ton better.  This was becoming a hug junk drawer and I'm glad to be able to find what I need and now know that I'm good with razors and deodorant, but need to order some bar soaps.   Since going back to short hair last year I've not used my flat iron, but I love it so I keep it tucked in the back of the drawer.  I do need to adjust my feminine items since some of them I've had a while and really don't plan on using.  I only have them because my mom bought them.


My purses are pretty easy, I just sorted my totes (far right), actual purses and then hiking bags (far left).  In the striped shoe box I added my wallets and the black bin I have what few tights and dressier items that I own just in case I might decide to wear a dress and my travel pillow over top.  


I think my towels are by far my favorite organized drawer tonight I think mainly due to having sufficient tubs to hold them in. After a few rounds this drawer usually ends up looking like a hodge podge so I hope this will help to keep it somewhat tidy.  

I didn't realize how many hair towels I had until I started sorting them tonight.  Though most of them were given to me by my grandmother, all brown & extras she wasn't using.  They work when I travel or when I'm out of the 3 white one's I prefer to use, but for now I see no reason to part with them.   I have parted with a few hand towels since a month+ ago I purchased some new one's for the kitchen and bathroom downstairs.

I also used clothespins for labels, but I don't think I'm going to keep them as they're really not that practical for this drawer.


My sheets I think shortly will need to be included in a drawer organizer, but I have to find one around the house or I'm thinking I might grab my last stitch fix box that I haven't thrown out yet.  

My hand towels fit nicely in the back and in front of them are a few wash cloths, though I rarely use them.  Then to the left of the wash cloths are my pillow cases.  I'm thinking I should purchase a few more of them, maybe red, blue and yellow to match my pattern cases I love.
  
It's nothing fancy, but it's all about small steps that move you toward your end result. Sometimes done is good enough for some areas.

What are some steps you have taken in order to create order in your home?

Monday, October 21, 2013

a little creative progress

It's been a challenge this last month trying to get myself organized at the home front, but I feel like I'm going to reach it by the end of this year which is a good feeling.  I've lived in my home for over a year and a half so it will be nice to finally have my home looking like a place I can be proud of.  

Lately, my focus has been completing mini projects for any room, and getting my 3rd floor room ready to tackle all of these projects.  It's basically going to become my creative space.  Yep I'm finally going to have a place where I can set up my computer and blog on a regular basis, work on my diy projects and my workout gear. 


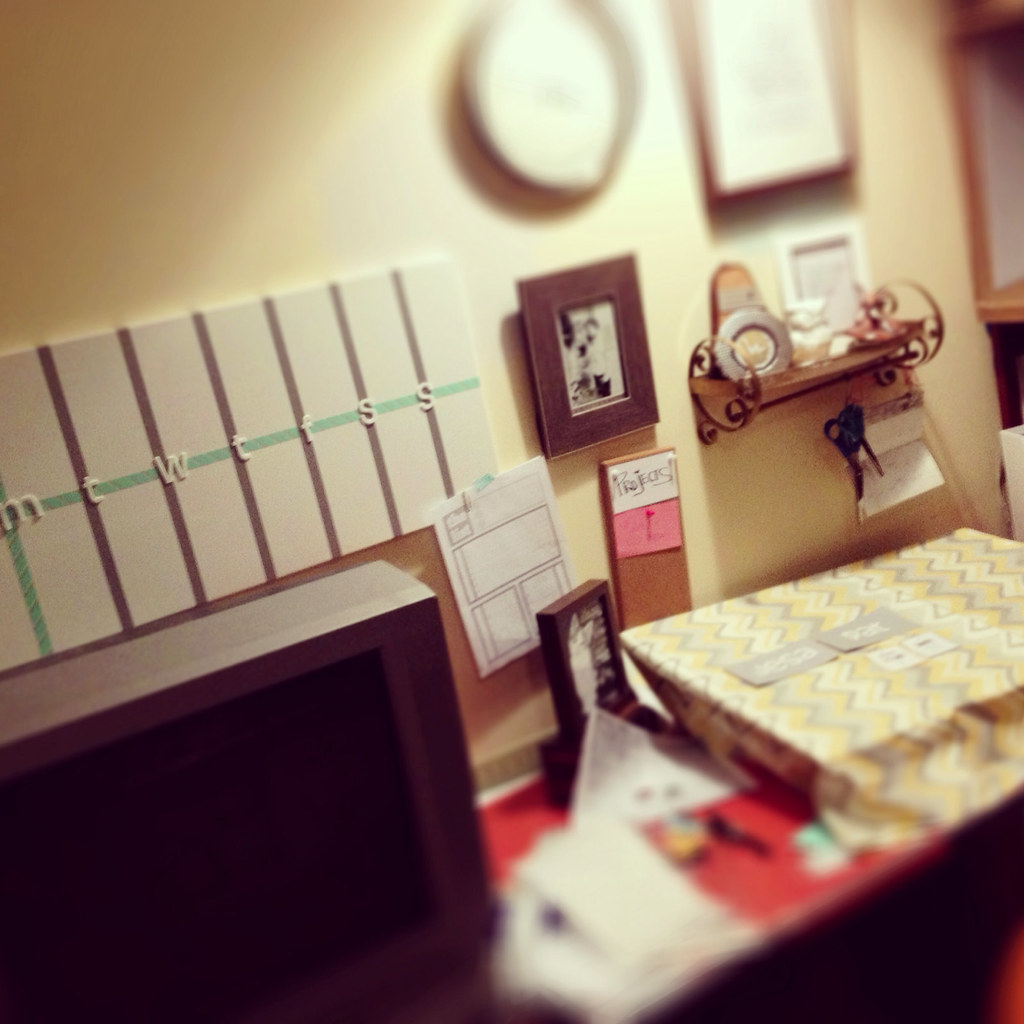
Here is what I have so far, a make shift desk with a formica table top and 2 mcm end tables.  I'll have a post coming in the next week or 2 with how the room is coming along.  It really is getting closer, however I'll feel better once I have a legit desk and workspace for bill paying.

Resources:

the white board is magnetic $13 and purchased recently from IKEA. I used some mint & pink, gray/silver WASHI tape from JoAnn's to separate the days of the week and then added some white letter stickers from TARGET $5. 

Picture #1
I've had this frame for about a year now, and finally have a room where it's going to fit in.  I purchased it from TJMAX or Marshals and I'm really glad to finally have a home for it, because I really love this frame.  In it I've added a post card photo of Andy Warhol that I purchased from his museum in Pittsburgh a few years back. 

Above the photo is a modern clock with a silver rim.  I've had it forever it seems.

Gold Shelf:
I'm not a fan of the gold, but I love the shape of this shelf and was happy when I saw it for only $1 at a second hand store, especially since it runs over $20 on etsy.  This is the closet shelf I could find now that's similar.  I plan to paint it to match the new wall color, well it will match once I paint the wall.  I just decided on the wall color last week, Love in the Mist by Martha Stewart.

on the shelf I have a white ceramic rooster I found at TJMAXX last year.  I'm not a fan of roosters, but I really loved the modern twist on this one and just had to have it.  The mini pear bulletin board is also a second hand find with some scrapebook paper added for some visual interest.  The round frame is also from TJMAXX and I added a DIY art of SUN SHINE.  I used a similar method like my repeat art.  A white ceramic owl from TJMAXX, a 5x7 wall frame from IKEA with print out of an inspirational quote and then I used a pink sharpie to trace over the arrow and added a felt heart over the red one for some dimension.   I also have a vintage deer stapler.  I used some s hooks from IKEA grundel collection to hang my scissors from the towel bar. 

The mini corkboard is from Target.  I frame a cat print in my IKEA Ribba 5X7 frame.  The yellow chevron fabric is from Joann's.  It's the beginng process of my chore chart.


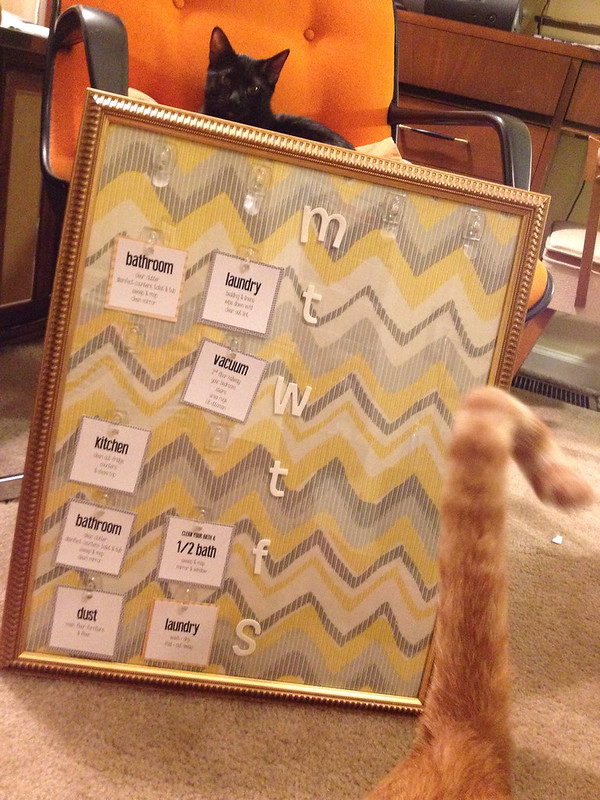
Here's where my chore board is at now and of course Adonis Mr. Center of attention and Goldie working his way out of the frame.  I took the day stickers from the white board above my desk since I had added them with the intention of using that board for the chores, but liked this idea better.  I really wanted to use this chevron fabric that I found at JoAnn's last week and on sale.

I still need to laminate all the cards and cute out the tab holes, then add more command hooks.  You can buy them in a pack of 18 for around $8.  I used a few inspirations for the board, which you can find oops I craft my pants, the workman family, the daily 5, and a beautiful mess,


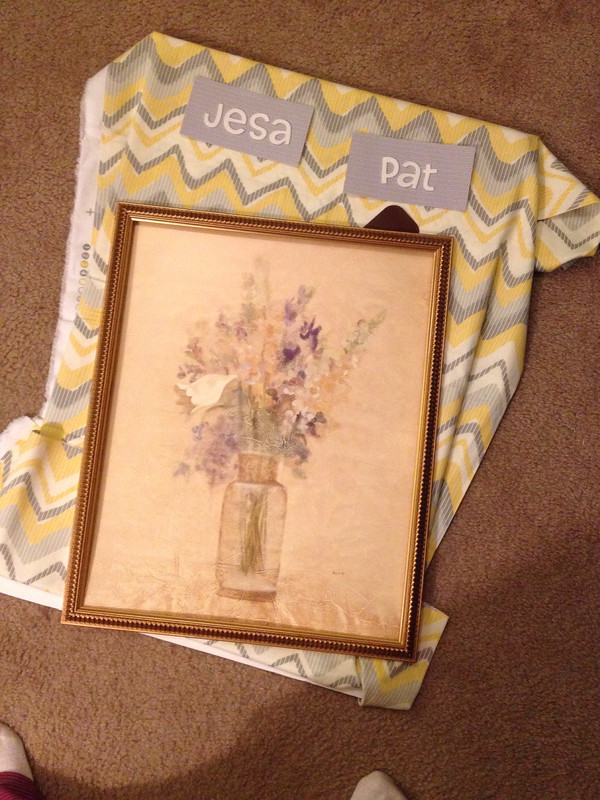
I had this frame, along with it's twin that I used for another project (below), waiting for my command center.  It feels good to finally move out of the planning stage and into the implementation.  The frames were about $3 for the and they have plexiglass fronts which was a plus for me.

Once I took the original picture out I cleaned the plexiglass with window cleaner and to help move back all the picture tabs on the back I used a pan scrapper, which is a major time saver and easier on your fingers.

I also ironed out the fabric to smooth out the creases and sprayed 2 coats of starch (allowing a few minutes between coats and a quick iron before adding the 2nd coat) on the fabric before wrapping it around the backing. 


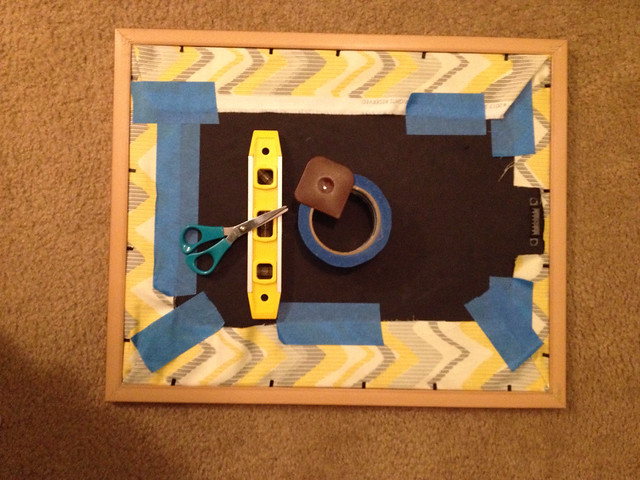
 I used painters tape to secure it to the back.  I like straight lines even when no one sees it so I used the scissors to also cut my painters tape. I used the level to make sure the chevron pattern was straight before taping. 

color run art

Creative space organization

After my first 5K color run in DC last month I purchased a blue color run scarf to frame and add to my run wall.  I used the twin frame to the chore chart and followed the same process as I did above to wrap the fabric.  I plan to add 2 more run inspirations next to the color run art, but I didn't get around to doing that today. 

Wednesday, October 2, 2013

{60 minute} DIY WAKE.RUN.REPEAT

Tonight has been a rather productive night for me, and I'm glad to be posting as there has been a lot happening these past 2 months that I've wanted to post, but it keeps getting pushed aside.  Well tonight I'm also pleased to say that I've been working on a new way to organize my spare room, which I'm turning into my creative room.  It's going to house all my crafts, and easy DIY projects, along with my etsy office (for 2nd hand items), and my workout space.  I've been scouring Pinterest for ideas, and my brain tonight has been moving forward towards a few wall ideas for boards and a blog calendar. 

While scouring the web tonight I found a post from my office pin board with a home gym wall vinyl that I've liked, but at some point I'd figure out what I wanted to go about using it.  Well, tonight after doing a quick search to find a better image that I could trace and create my own cardstock I headed to my bedroom where my SHARPIE Paint Pen was located and came back up to my laptop and tilted the screen, then used 2 small pieces of scotch tape to tape it to my screen and then I proceded to trace the letters (the back light of the screen made a nice light box) with the small end of my calligraphy pen.  


Once I finished, and you can see that I wasn't very neat about it I carefully pulled the tape off the screen and placed a small section of newspaper under it, just in case it bled through, and used my paint pen and colored it in.  I took a little more time with this part, but overall the project took less then 2 hours. 


My creative space color scheme is going to be pink, black and white, so I luckily I had white cardstock and a black paint pen already on hand.  I decided I wanted to use pink for SLEEP, but not until after I already filled in the SL so only EEP will be pink.


supplies:
Calligraphy Pen
Cardstock, color of choice.
laptop or light box if you have a printable


Once I trimmed my 8x10 card stock I found some inspiring scrapbook paper and trimmed it to fit the frame and then used double sided tape and laid the print right on top.


I'm pretty happy with the outcome and now I just need to find an appropirate frame for it and buy a pink paint pen to finish sleep.  I took it outside so you could see how nice it really came out.  the lighting in my creative space is pretty bad since it's a converted attic.


It's now residing on my workout stand next to my pants bin.  At some point I'll hang it on the wall, but I need to remember to grab some command strips from my the main floor.

Tuesday, April 30, 2013

For the Love of Muffins & Birthdays

Tuesday April 16
It's that time of the year where I celebrate me, Remanence on the happy years before and make plans for the year to come, but the day really really seemed like any other and was over as fast as it started.  The one thing I do look forward to for my birthday is attending D.C. for their Lindy Exchange (April 19-21);  a whole weekend dedicated to swing dancing (Lindy Hop and Blue's during the late nights).  Previous years I've gone down on Friday after work and drive back Monday afternoon once I've rested, but this year I headed down a day early to attend their weekly event, Back Room Blue's that I've been wanting to attend for a while now. 

Birthday Surprise

Well, anyways back to my present, which is so fantastically gorgeous and stunning!!!  Yes, I bought a dress, well  okay I didn't buy it, but my mom did for my birthday.  This will be the 2nd dress I bought in a month, which is not normal for me as I really don't like wearing dresses. However, after trying this dress on at TJMAXX by Ralph Lauren I was a total fan and really wanted it, but the price was steep at $60 and I wasn't really sure how often I would wear it so the price just wasn't practical at all for that uncertainty of wear.  Well, after showing the photo to my mom, along with some other things I hadn't bought that same day she surprised me with it.  I was super stoked.  Don't I look amazing!  


Those who know me would be proud that I have worn it already for an event.  I took it down to DC with me my birthday weekend and Wore it Thursday night for Back Room Blue's.  I had lots of people compliment me on how great I looked in it and one specific guy who made me blush by saying to me just before we began our dance that "You look amazing in that dress." Sigh.

Birthday Muffins
I came into work this morning w a platter of yummy looking blueberry & poppyseed muffins on my desk and secretly hoped they were for me & Indeed they were. Shortly after settling in my wonderful coworkers Ron, Sharon & Renee came over,lit a birthday candle on the center muffin & sang me happy birthday. It was pretty exciting and very thoughtful, especially since muffins are healthier then cake. I love that! And I especially love blueberry muffins

Closet Reorganize
I've also been pretty steady and proud that I've been adding more items to my postmark closet. Some things have sold, but not to many these last few weeks.  With that I also cleared out my closet on my birthday, on 04/16, clearing out quite a bit more items and then separated my apparel so it's easier to find the right outfit.  All my dancing and dressier tops are all located now on the top rod and all my work shirts are on the bottom rod.  It's been much easier this last week to find the right top to go with the specific outing. 


Wednesday, February 27, 2013

3013-02-27 GID: Home to do updates

For being sick this last week I've made some good progress with the house, and if you follow me on instagram then you've seen a glimpse into my progress.  It's been fun getting some of these little projects done that I've been procrastinating because I'm really not crafty or real great with any power tool other than my power drill.  

My mom had brought home a Wardrobe for us to use in the living room, but it was just way to obtrusive into my entry way and there was no other place to put it.  I decided to use it for a while, but when we started to post more items onto craigslist she agreed to put this up.  We ended up lowering the price & re-listing the ad each time in the few weeks (always deleting the old one, such a pet peeve to see duplicate ads).  I was glad to get what we did since 2 sellers in Baltimore were selling the same on for half of what I got out of it and the two ladies who bought it were delighted to get it.  I think as delighted as I was to see it gone when I got home.  


What's even better is the IKEA TJUSIG Hat and coat stand that I was going to replace it with I scored on the 9th from a person in Camp Hill who was selling the white and silver one for $20, that's a $30 savings from the original price and it was in new condition and all put together. 


My inspiration for this project came from a pinterest search for Scandinavian wall art.   More to come in a post soon.


Can you believe it I not only committed to a color for my kitchen, but I actually started painting it!!!  With all the priming and prepping I had to do I only managed to complete this side of the kitchen, but more to come with Martha Stewart saves the day part 2

I found this curtain pair at Marshall's Wednesday while out and about and had planned on hanging it in my living room, however, it was a food to short, but turned out to go very well in my kitchen.  I grabbed my Home Depot curtain rod that I've been storing for my bedroom, but had recently decided not to use for, and attempted to install it on the wall.  I like the look, not in love with it.  I still really want it for my living room, but for now this is the home where it will reside. 

I had bought these pretty curtains from Marshals and I thought they would look amazing in my living room, well once the walls are repainted, but they turned out to be a food to short for the space.  Plus, in order for them to look amazing I would need 2 panels for each window, and they only had 1 set available.  I ended up putting the current curtains back up, and moved the new curtains to the kitchen, as shown in the photo above. 

Wednesday, February 13, 2013

{60 minute} Supporting the Bed

I love my new bed set, but have been having some issues with the railing support system since I'm minus an actual box-spring.  The original railing system was a j-clamp wood rail with 3 L-brackets on evenly spaced to hold a box-spring, which wasn't feasible with my mattress.

The store owner is always pleasant and was kind enough to help me chose the railing above as an alternative, however, even with the 2" rail brace & the 1x3 planks that were 2" shorter then the width of the railing I felt as if the mattress was going to fall to the floor.   

The following Saturday I headed over to the second hand store to check out what other railings he had available and also to see what new furniture pieces have arrived since my last visit.  I did find a few railings options available, but one that struck my interest.  I wasn't sure if I would gain the courage to ask the owner if he would be willing to swap out the railings again in hopes that this one would be the last, and I am glad I did.

The store had 5 minutes till close and I had thought that I would come back in a few days to swap it out, but once I got into the car I swiftly changed my mind and headed home to grab the railing and within a few minutes I was back at the store with railing in hand and I left very happy with my new railing. 


Once I had the new bed rails I headed back to the house and connected them to the bed and was so glad that they slide right into the frame notches, especially since the last rails were a bit of a fight to connect.  Once that was done I remeasured to make sure that the width didn't change and headed to Home Depot to pick up new planks to fit the 2" width difference with the new bed frame.


I had originally planned to just pick up a few 1x3 planks and had a different plan then what I ended up with, which was basically the same deal I had prior, but a bit more costly.  The Lumber guy at Home Depot leaded me toward 1x6 planks instead of the 1x3, which would give more support and a 2x2 cut into 10 pieces to put under the planks for additional support across the bed.  The planks cost about $25 and the adjustable screws almost $20, which I though was a bit excessive so the screws went back.

At my next Home Depot trip I returned the expensive hardware and purchased a $3 pack of wood screws which I figured would service the same purpose only cheaper. 


Here are all the tools that I needed to put the frame support together.  The 2x2 strips were originally cut in 8-1/4" height, but turned out to be to tall.  We remeasured and it was 7-1/4 so we had them trimmed down but when I went to install them they turned out to be a half inch to short so this is where the furniture pads came into play; they gave me a bit more height which worked well.  I used my 9/16" drill bit to drill a few starting holes.

I forgot to mention and photography the velcro that I used to attach the planks to the railing so they wouldn't move.  It cost $3 for 2-4"  strips that I cut in half so I could stretch the velcro a bit.  The middle two planks didn't get any velcro.  The next velcro option was $10 and gave me more then I needed so that's why I chose not to velcro the middle two.


My drill wasn't strong enough to push the wood screws all the way in so I used the screwdriver to turn the screw while turning the foot the opposite.  I drilled right in my bedroom and used my shark vac to clean up the mess.  I installed 6 legs all together; 2 at the headboard, the footboard and in the middle.  I added 1-2 furniture pads under each leg depending on the height needed.  Once this was done, which took maybe a half hour we put the mattress back on the frame.


What do you think of my new boxspring?  I know I'm sleeping sounder and secure.  

Monday, January 28, 2013

2013-01-28 Fitness Monday:Motivation Board

The last few months my workouts have been pretty laid back, nothing really regular just an occasional jot on my elliptical or some body weight exercises like from the Bikini body Mommy Challenge, which only lasted a few weeks, before I realized that it was to much for me right now.  Though even with a lack of physical activity my eating habits have been moving toward making smarter choices, and only eating 3 meals each day with a snack if needed and my morning cup of coffee.


You wouldn't believe that by my lack of motivation tat a few months ago I was one of those people who lived for working out everyday, even when I was injured you couldn't get me to rest.  I would even wake up at 5:15am every morning to hit the gym, and even after buying my home I woke up at 6:30am to make sure I got my morning run in.  Honestly, it was still a struggle waking up and going to bed early, but I love the happy, strong, and confident person I was because of those choices.   I really miss her so I've been doing what I can to get her back and this  motivational wall has been helping me find her again.. 

Motivational Fitness Board

The kick start for the motivational wall came from this board and a blogger who decided to Run a Mile a Day from Thanksgiving to News Years so she could start the New Year off right.  Although there are many workouts that I've wanted to start, but either never do, or quite a few weeks into this one seemed a bit more my style.  With this it I was able to successfully create my own motivational wall after several times attempts.   Also, with it now several weeks into the New Years I decided I would run 1 mile a day until Valentines Day so I could feel a bit more fit on the big red day.


I used basic supplies I already had on hand; post it notes, index cards, green fabric that I covered on a bulletin board, a sharpie fine point pen, and a white board calendar that I had actually just purchased from a second hand store the other week that seemed perfect for this idea and I love how it came out.  In order to give the font a little more interest I doodled with the lettering and really liked how it turned out. 

I love this black white board that I found at a second hand store for $.99 and it works great with post-it notes slightly trimmed on the sides to fit the squares to mark each day and my total miles run.


The image above was a quote  Will you make this a great weekend by taking small steps to reach your goals, food, fitness, planning, anything I read while browsing though my news feed on facebook.  I can't remember if it was from Shape Magaizne or Runner's World and it inspired me to get up,so i added it to my board.

The following weekend I found this quote from Runner's Magazine on January 20 Believe you can do it. Think no other way but 'Yes you can.' The human body is capable of considerably more physical endurance than most of us realize. - Paul Reese 

January 18, Friday
A mile a day till Valentines Day.
It was F-in cold on Front St & so glad I ran 2nd on the way back - far more tolerable. Though I wasn't alone running this morning their was a guy running in shorts on the river side of Front.

WARM UP: 5 min walk & 2 min cool down (included in pace).  1.52mi. run in 18:27

January 19, Saturday
A Mile a Day - Day 2 completed. .
1.13mi. run in 11:34

January 20, Sunday
A Mile a Day day 3 complete.
1.53mi. run in 16:01

January 21, Monday
A Mile A Day completed Day 4.
Weather for run was crisp, but not windy & enjoyable.
1.07mi. run in 11:16

January 22, Tuesday
A Mile A Day Completed Day 5
1.06mi. run in 11:01

Thankful for my running ninja mask to block the wind chill, however my legs missed a layer. I thought my Lululemon wind pants would be fine, but nope not meant for this kind of day.

January 23, Wednesday
It was a a bit cold out this morning, so I opted for the Elliptical instead of my morning Run outside. I'm still counting it as part of my Run a Mile a Day so Day 6 complete. total Time: 22:35 / Strides: 3166 / Resistance: 5 / Incline: 7 / Calories: 231.5

January 24, Thursday
A Mile a Day Day 7 complete.

Elliptical Workout: 30 Minutes
Strides 4386 / Calories 325 / Resistance 5-6 / Incline 7

Also read pg 220-228 of my book while working out. Snippet from book to repeat to self: Don't indulge in something that's less healthy because it's around. That's not a good enough reason. pg 227.

Morning Run again thwarted by the snow, but it didn't keep me from my workout. I simple swapped my run for my elliptical again, though I would rather be outside running.

January 25, Friday
No workout

January 26, Saturday
I thought with the snow an elliptical workout would be best, however, on my way to Baltimore I saw 4 runners on Front Street which made me feel a bit guilty for now going outside for my run.

Elliptical: 31 minutes / 340 calories / 4700 strides / 5 resistance / 7 incline

January 27, Sunday
A Mile A Day completed day 10. Plus got to try out my new lululemon running hat that just arrived yesterday. Love it. Even ran an extra mile for missing my workout Friday. .
2.24mi. run in 24:43  

I was using Pinterst the other week to search for Running Inspiration to inspire me to get out of my lazy streak and secondly to find inspiring quotes to frame so that I can read them on a daily basis as I'm waking up to inspire me each day to wake up and chose healthy choices.   I've been slightly overwhelmed with items I would like to add, but have been trying to narrow them down.  


Sources for the quotes and images I want to use on my fitness wall: 

- The Best Way to Make Your Dreams Happen... Is to Wake Up  Tone It Up
- To Happiness  Shut up and Run
-  Keep Calm and Run Strong  Lazy Girl Running
- Keep Going 
   Let the morning bring me word of your unfailing love, for I have put my trust in you. Show me the way
   I should go, for to you I entrust my life. Psalms 143:8 R-L Blesses Tumbler
- Come to me, all you who are weary and burdened, and I will give you rest. Matthew 11:28
   {Dec 28, 2012 10:23 pm} R-L Blesses Tumbler
- Be the Girl you were to Lazy to be Yesterday Unknown Source


Wednesday, January 16, 2013

{60 minute} GID mini projects

Shower Caddy
I've spent the last few months dealing with the annoyance of my shower essentials having to be stored on my IKEA stool that was intended for when I shave my legs, however, it's been difficult with everything stashed on top and a lot of the times my larger bottles fall.  I've tried a few options, but none of them have worked until my 3rd try.  It would have been an easy fix if I didn't love having my drop down shower head.  It really helps since my shower is pretty small, but the metal cord isn't very flexible and doesn't work with shower caddies that hang from the shower head.  Which is a huge bummer since I found an amazing shower caddy with a vintage vibe for only $16 from Marshall's,  but it had to be returned. 

Next was this vertical shower caddy from Target that was a whopping $26.  I thought it would look nicer for the price, but it still looked cheap and I couldn't get it to stand up straight.   I tried to tighten it, but it was to short without the extra extension piece and about a foot to tall with it.  Plus, the base of my shower is a bit wonky so now it's packed back in the box and awaiting my next trip to Target to go back.  


After this fail it hit me that I should have just bought 2 more of the clear shower suction caddies that I've been using already.  It's fantastic and suctions to my glass wall like super glue so I purchased 2 more and they are working fanatically. 


Clean Paint Brushes
After some procrastination I finally tried this DIY I found on Pinterest, however, I really didn't find that it helped any bit as the brushes looked like this before, during and after.  I even let it sit for longer than 30 minutes. 

Clean Paint Brushes
  1. Buy White Distilled Vinegar Add to bucket
  2. Pour Hot water in with Distilled Vinegar.
  3. Add paint brushes to bucket
  4. Let sit for 30 minutes

Freshen Your Sink Drain

Freshen Kitchen Sink Drain
  1. Buy Baking Soda {1 TB}
  2. Buy White Distilled Vinegar {1/4 cup}
  3. Mix ingredients and pour over drain
  4. Let bubble and spray clean

December Items Donated:
Another pile of items that headed out the door for someone else to enjoy.


Tuesday, January 8, 2013

Green Chevron Love & Christmas Wrap Up

I've been needing to take down our Christmas Tree and what few decorations we had up and I'm finally glad to have it clear out, especially since it sparked a makeover in my Living and Dining Room. 

Here is what I started with to take down.


I started out taking down the ornaments from the tree, then the beads/garland and then tucked the faux tree back in it's neat little box and it's now put away in our still needs to be organized  basement and then I began to vacuum the living space before making a move for the sectional.  The original thought was just to move it away from the wall a few more inches, but then decided to make a whole new layout for the living room, which I'm quite delighted with.


Merry Christmas to Me
Also, here is the beautiful Chevron Wool Jacket my best friend ordered for me from Poshmark.  I love it!  Though the hip area is a bit snug, but still very much wearable.