Monday, October 21, 2013

a little creative progress

It's been a challenge this last month trying to get myself organized at the home front, but I feel like I'm going to reach it by the end of this year which is a good feeling.  I've lived in my home for over a year and a half so it will be nice to finally have my home looking like a place I can be proud of.  

Lately, my focus has been completing mini projects for any room, and getting my 3rd floor room ready to tackle all of these projects.  It's basically going to become my creative space.  Yep I'm finally going to have a place where I can set up my computer and blog on a regular basis, work on my diy projects and my workout gear. 
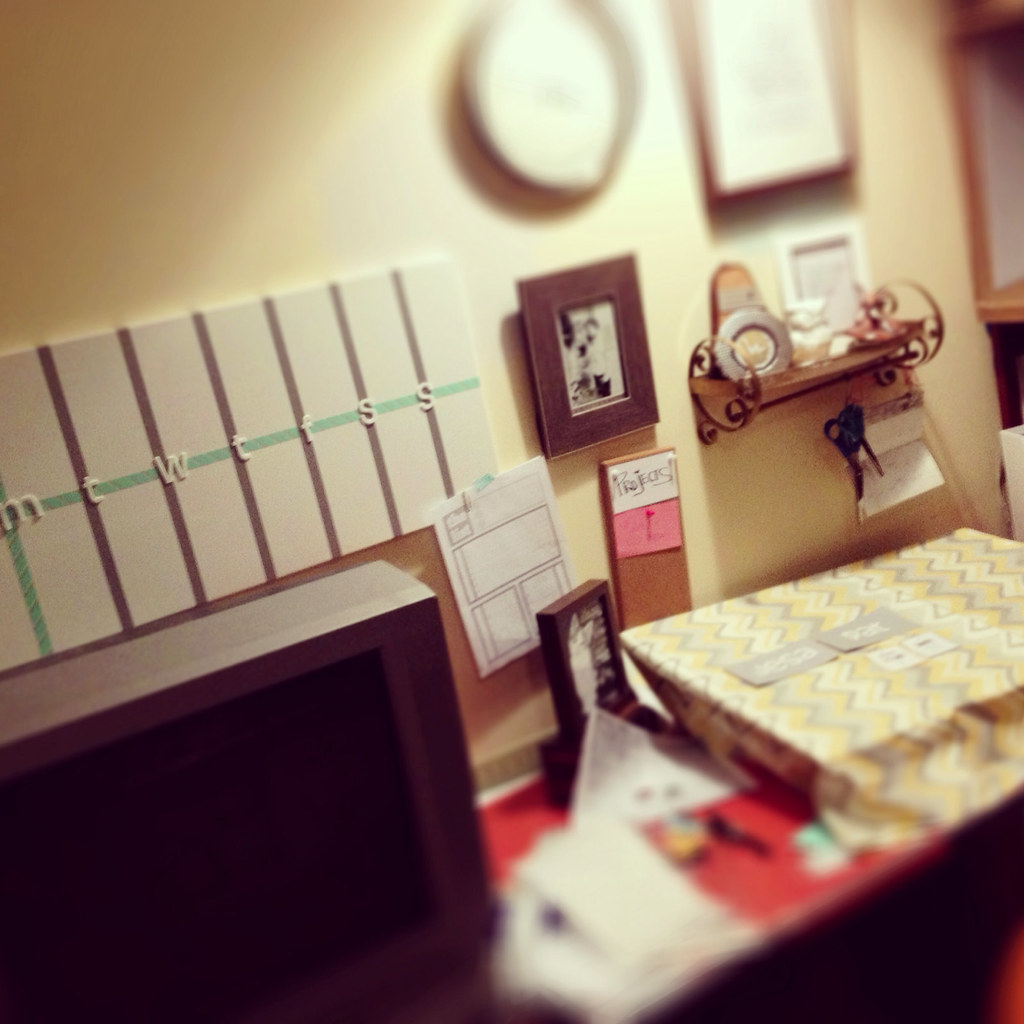

Here is what I have so far, a make shift desk with a formica table top and 2 mcm end tables.  I'll have a post coming in the next week or 2 with how the room is coming along.  It really is getting closer, however I'll feel better once I have a legit desk and workspace for bill paying.

Resources:

the white board is magnetic $13 and purchased recently from IKEA. I used some mint & pink, gray/silver WASHI tape from JoAnn's to separate the days of the week and then added some white letter stickers from TARGET $5. 

Picture #1
I've had this frame for about a year now, and finally have a room where it's going to fit in.  I purchased it from TJMAX or Marshals and I'm really glad to finally have a home for it, because I really love this frame.  In it I've added a post card photo of Andy Warhol that I purchased from his museum in Pittsburgh a few years back. 

Above the photo is a modern clock with a silver rim.  I've had it forever it seems.

Gold Shelf:
I'm not a fan of the gold, but I love the shape of this shelf and was happy when I saw it for only $1 at a second hand store, especially since it runs over $20 on etsy.  This is the closet shelf I could find now that's similar.  I plan to paint it to match the new wall color, well it will match once I paint the wall.  I just decided on the wall color last week, Love in the Mist by Martha Stewart.

on the shelf I have a white ceramic rooster I found at TJMAXX last year.  I'm not a fan of roosters, but I really loved the modern twist on this one and just had to have it.  The mini pear bulletin board is also a second hand find with some scrapebook paper added for some visual interest.  The round frame is also from TJMAXX and I added a DIY art of SUN SHINE.  I used a similar method like my repeat art.  A white ceramic owl from TJMAXX, a 5x7 wall frame from IKEA with print out of an inspirational quote and then I used a pink sharpie to trace over the arrow and added a felt heart over the red one for some dimension.   I also have a vintage deer stapler.  I used some s hooks from IKEA grundel collection to hang my scissors from the towel bar. 

The mini corkboard is from Target.  I frame a cat print in my IKEA Ribba 5X7 frame.  The yellow chevron fabric is from Joann's.  It's the beginng process of my chore chart.
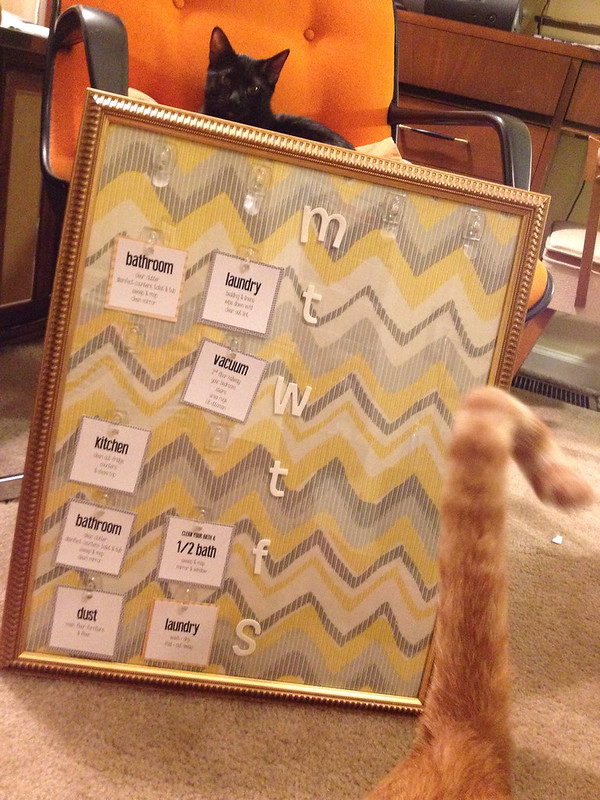

Here's where my chore board is at now and of course Adonis Mr. Center of attention and Goldie working his way out of the frame.  I took the day stickers from the white board above my desk since I had added them with the intention of using that board for the chores, but liked this idea better.  I really wanted to use this chevron fabric that I found at JoAnn's last week and on sale.

I still need to laminate all the cards and cute out the tab holes, then add more command hooks.  You can buy them in a pack of 18 for around $8.  I used a few inspirations for the board, which you can find oops I craft my pants, the workman family, the daily 5, and a beautiful mess,
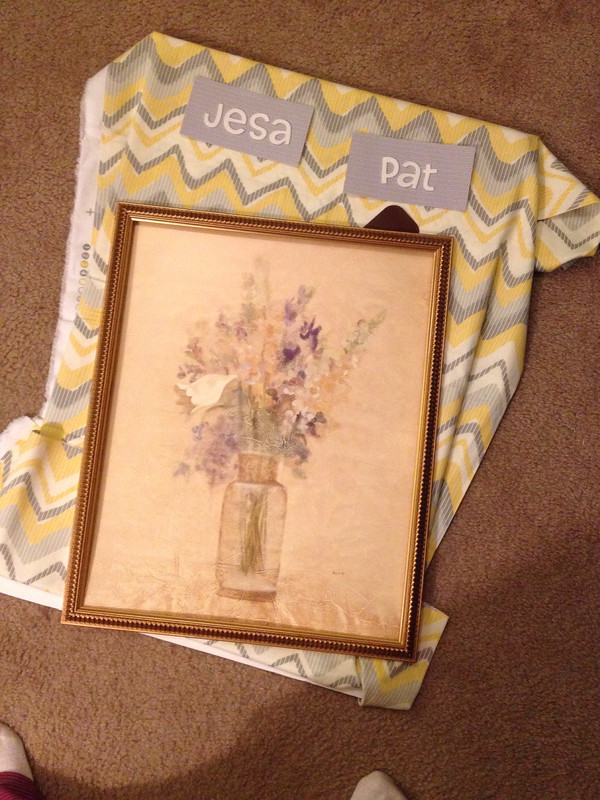

I had this frame, along with it's twin that I used for another project (below), waiting for my command center.  It feels good to finally move out of the planning stage and into the implementation.  The frames were about $3 for the and they have plexiglass fronts which was a plus for me.

Once I took the original picture out I cleaned the plexiglass with window cleaner and to help move back all the picture tabs on the back I used a pan scrapper, which is a major time saver and easier on your fingers.

I also ironed out the fabric to smooth out the creases and sprayed 2 coats of starch (allowing a few minutes between coats and a quick iron before adding the 2nd coat) on the fabric before wrapping it around the backing. 
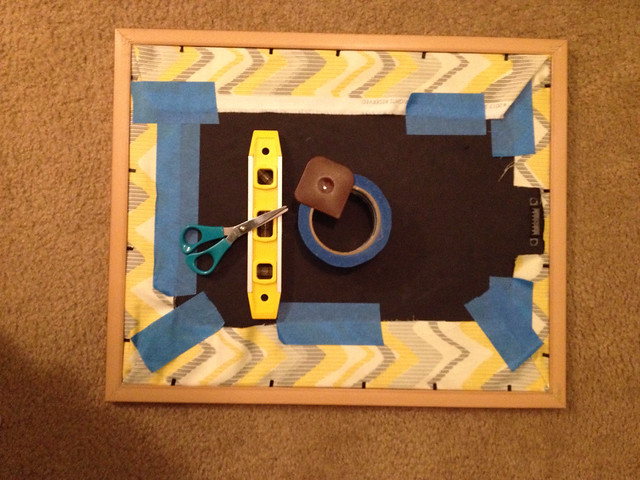

 I used painters tape to secure it to the back.  I like straight lines even when no one sees it so I used the scissors to also cut my painters tape. I used the level to make sure the chevron pattern was straight before taping. 

color run art

Creative space organization

After my first 5K color run in DC last month I purchased a blue color run scarf to frame and add to my run wall.  I used the twin frame to the chore chart and followed the same process as I did above to wrap the fabric.  I plan to add 2 more run inspirations next to the color run art, but I didn't get around to doing that today. 

Wednesday, October 9, 2013

shock and aw at the market

I'm sure you'll drop over in shock when I tell you that my mom and I went to our local Flea Market this morning to sell.  Yep, I know what a huge shock and it wasn't even my idea.  Willing without prodding my mom started going through things in the hallway yesterday sorting, and pricing while I worked on our 3rd floor.  It was amazing how much stuff we really had just lying around.  Our neighbor Ty, about 15, came over to help take things down to the main floor and gathered a few of the mega block toys and some other items from the basement.  

It really helped pricing things before hand and really it took no time at all to get things ready.   I was really expecting it to be more be more pain stacking then it was.  Our new neighbors, who had just moved in this week, even came over and bought a few things before we packed up the van.
So on our first day of gathering we already sold an  4 IKEA coffee mugs, a 6pc blue decorative plate set from TJ MAXX, jeanette rose plates, vinttage Jeannette china Desert Rose pattern, vinage canister set and an IKEA Knife block,

It wasn't long after they headed back next door that we started to load up the van.  For as bad as everything looked in our living room once we packed everything in the van it didn't look like much; however after gathering a few more items before we headed to bed and in the morning the van was jammed packed with money making potentials. 

My alarm sounded around 6 this morning and I was a bit nervous since there was no sign of movement from my mom.  However, by the time I finished my shower my mom was already downstairs gathering the items from the living room and loading them in the van.

Once everything was loaded and our snacks packed we made our way a few miles down the road.  We were unsure we were even in the right placed since there were no signs except for a camper show, but once we round the corner and felt a litter better until we had a short moment of did we miss a cut off time to pay to enter since there was no one at the toll houses; however once we passed through and asked a seller he directed us to the man in charge of lot assignments and after paying $15 for 2 spaces we rounded the market to find the best spot and ended up at the same spot we originally thought about taking.

Before we started setting up a few early birds came over asking up questions who were looking for jewelry and other trinket items; however we had none of the asking.  We mainly brought mega block toys, doggy accessories and walking items, some vintage items, a small amount of baby clothes, and some other miscellaneous items. 

We filled up a both parking spaces, which also included our van taking up the back half of the two spaces.  We sold a good bit in the beginning and towards 10am, but it was mostly dead and even the people we saw walking along didn't have much in purchases.  Oh, yes and I can't forget to mention that I had two guys make a move.  Yep, totally not lying.  I was just wearing my daily yoga pants and a modern large floral top and some makeup; nothing fancy.  The first gentleman was older about my grandfather's age who bought a truck with mega blocks for a neighbor kid and an adjustable dog bowl set for the stray cats near his house.  I had walked over to his van carrying some of the items he bought to be helpful.  Plus he was walking with a cane so he didn't have much in free hands to make this in one trip.   Before heading back to the van he asked me when would be the next time I would run into him and mentioned about getting my number and I chucked.  I mentioned that I enjoyed his conversation and we could talk again the next time we are both set up at the market, but politely mentioned that getting my number  wasn't going to happen.  I chucked the whole way back to our set up and mentioned it to my mom.  He seems safe, but it never hurts to inform those around you about men making moves that you've turned down especially just in case.

Oh, yes and a few hours later a man in his 30s came over to me and handed me a note and said it was from his friend at the set up a few lots down.  He also said that he waiting until I was away from my mom to hand me to the note so he didn't offend my mom.  It was a bit odd and felt a little like 2nd grade so it caught me off guard, but I opened up the letter and read it. 

If your curious, here's what it read:

If you didn't guess from my note above I did mention it to my mom, as again, you never know what type of people are out there so it's good to share situations like this.

I also had my mom not to long after our conversation walk around the market and see who my potential admirer was.  She didn't approve.  Although, my curious nature wasn't satisfied with her opinion and wanted to see for myself, so I wondered around the market again and ended up heading over there when being flagged by the young man who gave me the note.  I talked with the two of them and they seemed very nice, however, I did tell them a small white lie and mentioned that I was married.  The gentled seemed like a nice guy, but still a bit older then I would go for and not my type so it just seemed easier that way.  I'm sure God will forgive me of my lie this time and not judge me to harshly.

I didn't leave the market unscaled and brought home 2 small vintage finds that only stole $3.25 from our profits.  One of the items is a brass cottage house and picket fence key holder that will work beautifully for our spare keys.  The second item is a daisy kitchen timer by Mark Time that I've actually been eying on etsy for the last year.  My preference is the mustard color, but for $3 I will enjoy having the beige and brown option and using it when it times for our 15 minutes of declutting.  
Throughout the morning I jotted down a list of the items we were selling so at the end we could talley up our earnings have an exact account of what we made instead of estimating what we think we sold and made.
This was about 1/3 of what we had brought with us so overall I'm very happy with our results and we plan to attend next Sunday and the last market on the 25th and hopefully we can eliminate more items from our vast array of clutter and earn enough money to repoint our basement brick foundation.  We did eliminate a few awkward items and giving new life to our unused items.  Now someone else can enjoy some second hand love.  

What are some of your favorite finds from flea markets?

Wednesday, October 2, 2013

Labels and Title Changes

Decided it was time to update a few of my titles and tags since there are a few series I started, but never stuck with or others like Get it Done, Clear a Path & Organizing Me all seemed to mean the same thing to me after awhile and I felt to many posts were had several tags and the whole reason for tags is to separate posts so readers can find items of interest without scouring through everything else.  so I took some time Wednesday night and started deleting a few of the tags, however a few of them have more than 10 posts so it will take me some time to eliminate all the ones I feel are no longer useful for me or you, the reader.


After reading the  {Weekend Organizer} post by Fabulously Organized Home my head began to spin with new ways to categories my home projects and I really want to bring that into my tags, so you'll start to see these 10 minute / 60 minute / weekend organizer , which equal the length of the DIY or craft project.  I feel this will be more specific and easier to choose then Git It Done Wednesday, clear a path, before & after, and organizing me.

I also liked a blogger's wording when she was talking about the quotes that made her happy and she labeled those on her desktop page as happiness, so this will be all of the things that create a happy feeling in my heart.

All my dance exchange, and events for Lindy Hop will be under dance life.

All of my exercise, workout logs, running gear and anything fitness related will now be fit life and will take the place of sunny side up Sunday's, personal Health, and Life Adventures.

I love the words second hand love so that will hold all of my thrifty finds, and MCM Love.

Recipes will now carry the label yumminess, and paelo delight Sunday will simply be paleo.

Any projects that I found via pinterest will now be under pinned it instead of pinterest project

I also decided to add a few new labels to the mix.
  • house love - for some of my favorite images of my home
  • kitten life - to show the kittens as they are growing or any that host my corgi
  • lululemon - a favorite of mine for workout wear
  • to do list - home project lists, where I list a bunch of to do's that I would like to get done.

What are some of your favorite labels you have on your blog.
Also, let me know what you think of the new changes.

{60 minute} DIY WAKE.RUN.REPEAT

Tonight has been a rather productive night for me, and I'm glad to be posting as there has been a lot happening these past 2 months that I've wanted to post, but it keeps getting pushed aside.  Well tonight I'm also pleased to say that I've been working on a new way to organize my spare room, which I'm turning into my creative room.  It's going to house all my crafts, and easy DIY projects, along with my etsy office (for 2nd hand items), and my workout space.  I've been scouring Pinterest for ideas, and my brain tonight has been moving forward towards a few wall ideas for boards and a blog calendar. 

While scouring the web tonight I found a post from my office pin board with a home gym wall vinyl that I've liked, but at some point I'd figure out what I wanted to go about using it.  Well, tonight after doing a quick search to find a better image that I could trace and create my own cardstock I headed to my bedroom where my SHARPIE Paint Pen was located and came back up to my laptop and tilted the screen, then used 2 small pieces of scotch tape to tape it to my screen and then I proceded to trace the letters (the back light of the screen made a nice light box) with the small end of my calligraphy pen.  


Once I finished, and you can see that I wasn't very neat about it I carefully pulled the tape off the screen and placed a small section of newspaper under it, just in case it bled through, and used my paint pen and colored it in.  I took a little more time with this part, but overall the project took less then 2 hours. 


My creative space color scheme is going to be pink, black and white, so I luckily I had white cardstock and a black paint pen already on hand.  I decided I wanted to use pink for SLEEP, but not until after I already filled in the SL so only EEP will be pink.


supplies:
Calligraphy Pen
Cardstock, color of choice.
laptop or light box if you have a printable


Once I trimmed my 8x10 card stock I found some inspiring scrapbook paper and trimmed it to fit the frame and then used double sided tape and laid the print right on top.


I'm pretty happy with the outcome and now I just need to find an appropirate frame for it and buy a pink paint pen to finish sleep.  I took it outside so you could see how nice it really came out.  the lighting in my creative space is pretty bad since it's a converted attic.


It's now residing on my workout stand next to my pants bin.  At some point I'll hang it on the wall, but I need to remember to grab some command strips from my the main floor.

Friday, September 20, 2013

{weekend organizer} creating simplified + organized files p1

part 1: starting the purging process
 
I feel good tonight knowing that I've purged a little more in my office / spare room / workout nook on the 3rd floor.  It's kind of our catch all space and I really hate that about it.  I really want it to be a functional space where I can pay bills, workout, and get things ready to post on ebay/etsy/craigslist.   My workout area is actually the only place I like up here, and I redid that a few weeks ago, though I haven't gotten around to blogging about it.  I actually have a lot of posts I want to publish, but I haven't felt like typing them since I tend to write a book and would love to learn how to master the short hand of writing posts quickly, and still have something worth reading when I'm done.

I have several boxes with stuff piled in them, and I really had just been avoiding them and for some reason while looking for a Martha Stewart Paint pamphlet, which I didn't find, I decided to go through and sort some of the piles.  I was also hoping I would find a recipe for the one-piece bathing suit I ended up not wearing for my lake house trip (yep, another post I've yet to write), but no luck.  However, I did end up with several piles of now semi-organized papers.

I don't have a before photo since this wasn't planned and my phone was floors down on my dining room table, but just image the drawer 3/4 full of paper piles and the weaved basket overflowing w miscellaneous items and 3 shirts.    


I ended up with a few piles 1) doctor/monthly bills paid automatically 2) online purchase and non-home bills 3) work papers 4) paper recycle 5) to be shredded 6) coupons and misc papers 7) empty file folders and I even managed to sort through my receipt bin. 


Luna decided to make himself a bed out of my paper recycle bin after I was done and then later ended up in the shoe box.


Now that these piles are sorted I can finally get to reorganzing my personal files, which I plan to do similarly to Fabulous Organized Home and her post on how to Simply & Organize Your Personal Files.   I found it 11 days ago and her site has been helping me to figure out how to organize my mini-weekend projects so I can actually start to accomplish things instead of just surfing pinterest collecting really cool ideas.   


Currently I use a binder system, which I love using at work, but I've not had the same success with it at home so I'm looking forward to the change.  What are some filing systems you've had success with?

Steps to complete:
1) buy folders & labels
2) buy colored pencils 
3) create labels
4) put in alpha order & insert into file drawer.

Monday, August 26, 2013

Style Cure : Update #2

It's already Day 18 lock in your furniture layout and I've yet to get much further then cleaning up my room which is already messy again & I ended up taking back the southwestern rug, find picture inspiration and, think about the furniture layout.  Really it's just been daunting trying to figure out what I want and then sticking to the plan.  As I think I've found what I want and then I get distracted again and feel lost and end up stocking in my tracks.  

{SOURCE UNKNOWN}

I fear that my perfectionist personality and very small budget inhibits me from going any further in my design plan, but I really want to become someone who makes things happen instead of wishing that it was already done.  I know that when I've completed this project I'm going to really love my main living area.

This week I spent more time doing research on what would work for my space, especially when it comes to which walls are going to have what color and I'm happy to say that after seeing the design sponge sneak peak on Kiera Kushlan I knew exactly what I wanted for my dining room.  As well as seeing this entry way I hope to make it a reality by the end of the year in my home.  I hope that it will help to define the living space.


I'm also really excited to have my wall colors chose and feeling pretty confident in how it's going to come out.   I plan to start with the dining room since all I need to do in there is paint, change out the light fixture to a fixture similar to this double swag pendant and hang up some art.  


I plan on doing the same design as the design as above  instead of the starburst pattern I found last week.  I feel that the curved diamond stamp still adds a vintage look, but also keeps it simple with a slight touch of modern.  The stamps is a UK product so most likely it wont ship to me, and it will take some time, so I will end up making my own or using poster board to cut out a template.

 
I plan to use Martha Stewart's Vapor #1 for the main walls in the dining room and Mimosa #2 for the diamond accents.  The Living room will be Nimbus Cloud #3 and the wall closest to the kitchen will be Endive #4.  I also plan to make the entry wall that goes up the stairs Vapor #1 as well.   


Once I accomplish that I will work on adding the entry wall and painting the living room and determine if I still want to use Martha Stewart's Washed Denim as my accent color in there.  


What are some of your design fears and how have you overcome them?


Monday, August 19, 2013

Style Cure: Update #1

I decided not to worry to much about dimensions with my floor plan since I wasn't planning on adding any new future to the design plan for the Style Cure Day 5's challenge, which is all about taking time to measure your space and create floor plan so you can have accurate dimensions to help with the flow of your space by not measuring. 

Below is a basic idea of what my main floor looks like, minus the kitchen.  The red error points to our main door and currently our TV is centered in front of the windows, and the couch on the back wall.   


With this project I hope to accomplish a few main Goals:
1. Find Storage for the pet food and feeders on Stairwell wall
2. Adjust table to better fit in Dining room 
3. Hang art work on back wall in living room
4. Decide on a color scheme and paint!
5. Create focal wall on back dining wall
6.  Create an entry way

 Day 6 is all about learning about color and determining if your space is  private or public, which will help to move you towards warm or cool colors.   I decided to choose private as it moved me toward cool colors, which I felt would help to lighten up the space and "these colors quiet the emotions and sharpen our thoughts, allowing our mind to do its best work."  I do a lot of work in the living and dining room, and I want to make sure I can move towards my other goals at home by being inspired to keep sharp once I enter into my home. 

Day 7 was a weekend of cleaning and decluttering your space, as well as collecting color chips, however, on this weekend I had been out of town visiting some friends in D.C. so this was pushed to Tuesday.  I was pretty excited to do some maneuvering in the living after seeing this {below} living room layout from 6th Street Design.  I really liked the openness of the space and it resembled how my living room is.  It inspired me to think about  moving my 15" wide billy bookcase on the window wall, which would also give me some space to display some of my favorite items. 

Living Room Layout Inspiration Photo

Before:
Here is a reminder of how my Living room looked like prior to the Weekend Cleanup.

Here is what my living room looks like now, after 1) the new rug I found at Home Goods Virginia this past weekend, and 2) changing up the layout to match my inspiration. I wasn't able to fit the bookshelf to the left of the windows, but it seems to work nicely in the middle.  I think at some point I want to find a comfy loveseat to replace the vintage side chair just to add more seating.

After Cleanup:

There are still several things to do in this room, like moving the sofa to the left a bit more once the IKEA base cabinet that we were temporaily using as our entry table is sold.  Currently, it's being housed to the left of the sofa.  I also want to find 2 matching mcm end tables, and coffee table.  I love my circle end table, but it will need to find another home in the house.  I also plan to add the glass door to the Billy Bookcase so the cats don't knock anything over on the bookshelf, as they like to climb everything.  With that I'll be looking for a new used cat tower or wall steps for them to play on. 

Here are some other projects Potential Projects
1. DIY Picture Ledges
2. All You Need is Less Art Print
3. Sun Shine Art Print
4. Spray paint my table lamp
5. Gallery Wall 
6. Create a Stencil or Stamp for Dining Room Faux Wallpaper
7. DIY Welcome Sign Art Print

Day 7 of the Style Cure takes time to review your paint chips and then declare your decor pairing, whether it be a purchase or a diy project. This homework was assigned on the 12th, but didn't happen until the Wednesday night on the 15th.  After work I forced myself to grab all the supplies I needed from my 3rd floor office to put together a simple design binder for this project and then took time to review my pinboard images and my 3" stack of Martha Stewart sample colors I had already picked up at Home Depot a few months back when I was working on the color scheme for the house.  I had originally chosen: Vapor, nimbus cloud and endive for my main floor, but have since purchasing my new southwestern rug changed up the colors a bit.

I'm also torn between two different feels for the room:

Option 1:
Washed Denim,  Mimosa, Nimbus Cloud and Endive
I love the light and array feeling of this room, so I'm not sure I want to use the darker greens.  Plus, I really do love Endive in my kitchen and would like to incorporate it somehow as an accent color in the living/dining area.

Option2:

Accent Colors:
Living Room: Green, Red
Dining Room: Mimosa (yellow)

I'm still debating on if I'm going to stick with Vapor or use Picket Fence as my white background.